How to Fix Computer Shutting Down When Put to Sleep 2026?
Sleep mode is one of the most efficient power-saving features in modern computers. It saves energy, lets you quickly resume work from where you left off, and reduces hardware wear. However, many users face the frustrating issue of their computer shutting down completely instead of entering sleep mode. There are several reasons, ranging from misconfigured system settings to outdated drivers or OS, why such conflicts take place.
In this guide, we’ll explore different methods on how to
fix computer shutting down when put to sleep. By following these steps, you can restore smooth performance and enjoy the convenience of Sleep mode without interruptions.
Why Does Your Computer Shut Down Instead of Sleeping?
Before finding exact solutions, it’s essential to understand why this issue arises. Some common reasons why your computer shuts down when put to sleep include:
- Power Settings Misconfiguration: If your device OS or BIOS/UEFI power plan isn’t properly configured, it may shut down instead of entering sleep mode.
- Outdated or Corrupted Drivers: Corrupted/damaged drivers (graphics, chipset, or network drivers) can interfere with sleep mode functionality.
- Hardware Issues: A failing power supply, RAM, or battery (in laptops) can impact the sleep mode functioning of your device.
- Windows Updates and Bugs: Sometimes, the latest update introduces compatibility issues and affects sleep mode.
How to Fix Computer Shutting Down When Put To Sleep?
Now that you are familiar with the reasons why your computer keeps shutting down instead of going to sleep mode. Let’s proceed with different solutions to fix the problem:
Method 01: Check and Configure Power Settings
Incorrectly configured power plan settings on your Windows PC may cause shutdown issues instead of entering sleep mode. In such a case, you can follow the below steps to adjust these settings and ensure proper power management and smooth sleep functionality:
- Press the Windows + R key, type Control in the Run prompt and press the Enter key to launch the Control Panel.
- Go to Hardware and Sound > Power Options.
- Choose your current power plan and click the “Change plan settings” option.
- Click Change advanced power settings.

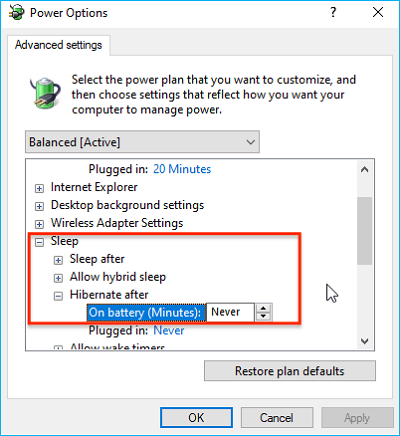
- Now, from the Advanced options window:
- Expand Sleep > Sleep after and select a reasonable time (not “Never” if you’ve to put your device to sleep).
- Expand Sleep > Hibernate after and check if it’s conflicting with sleep mode.
- Expand
Power
buttons and lid (for laptops) and confirm that pressing the power button or closing the lid is set to “Sleep” and not “Shut down.”
- Click OK to apply the changes and then restart your computer.
Method 02: Disable Fast Startup
Windows' in-built Fast Startup utility helps reduce boot times, but sometimes it interferes with sleep and hibernate functionality, causing unexpected shutdowns and conflicts. You can disable fast startup on your device to resolve sleep-related issues and ensure stability. For this:
- Launch the Control Panel, go to Power Options.
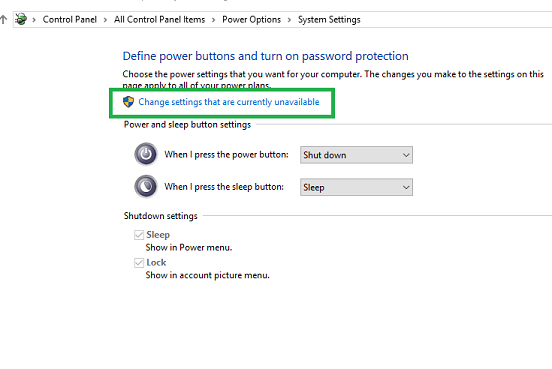
- Click on the “Choose what the power buttons do” option from the left panel.

- Then, click Change settings that are currently unavailable.
- Uncheck the Turn on fast startup (recommended) option located under Shutdown settings.
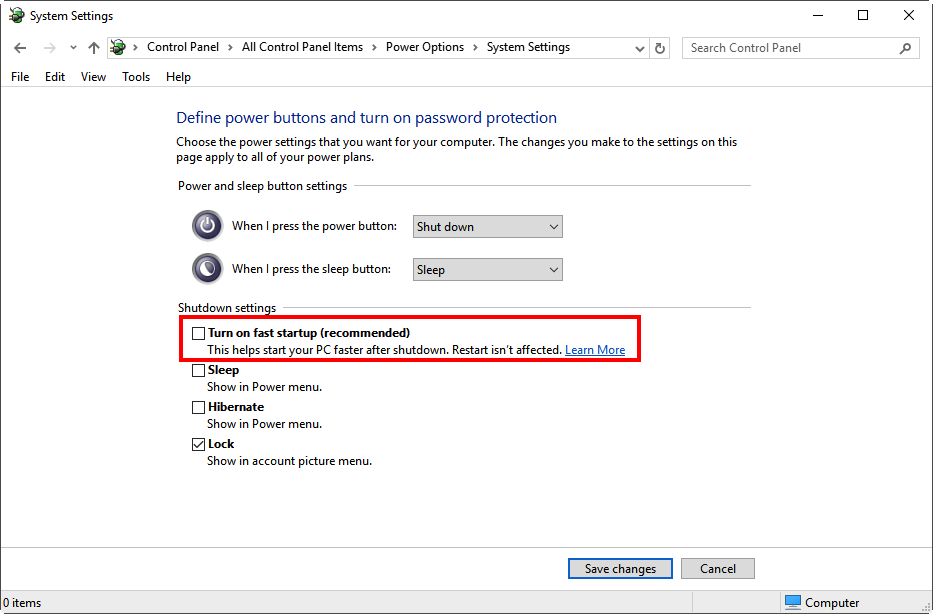
- Save these changes and restart your device.
Method 03: Update Device Drivers
Outdated or corrupted drivers are one of the main reasons for sleep mode issues on your computers. Whether it's faulty graphics, chipset, or network drivers, you can follow the below steps to update drivers:
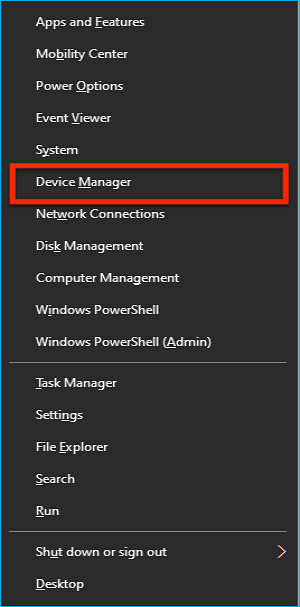
- Right-click the Start icon located at the bottom-left corner and select Device Manager.
- Expand each of these categories individually: Display adapters, Network adapters, and System devices.
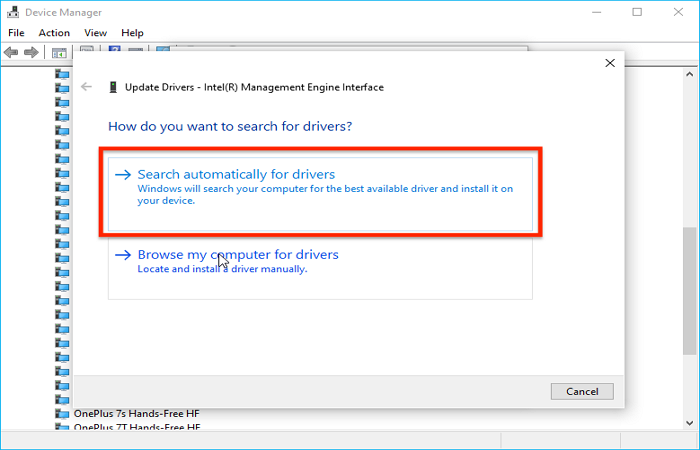
- Right-click on each device, choose “Update driver,” and then select “Search automatically for drivers.”
- Alternatively, you can download these drivers from the manufacturer’s official website (NVIDIA, AMD, Intel, Realtek, etc.).
Method 04: Adjust BIOS/UEFI Settings
Incorrectly configured BIOS/UEFI settings may stop your computer from entering sleep mode properly. Adjusting settings like ACPI, sleep states, and wake options often helps restore normal sleep functionality. To adjust these settings, you have to:
- Restart your computer and press the appropriate key (usually F2, F10, Delete, or Esc) to enter BIOS/UEFI.
- Check if the ACPI (Advanced Configuration and Power Interface) settings are enabled on your device.
- Also, check your system support S3 (Suspend to RAM) for sleep mode from different sleep states (S1, S3, S4, S5).
- Temporarily disable the Wake on LAN/USB option if it causes issues.
- Save the changes and exit.
Method 05: Check Hardware Issues
If the above methods won’t work, the problem could be hardware-related. Here are some common fixes that you can try to resolve it:
- Power Supply Unit (PSU): In desktops, a failing PSU can cause improper sleep/wake cycles.
- RAM Issues: Faulty or corrupted RAM may prevent suspend-to-RAM mode (S3 sleep).
- Battery Problems (Laptops): Sometimes battery-related issues may also shut down your computer instead of sleeping.
Moreover, you can run hardware diagnostics from your PC manufacturer or use tools like MemTest86 (for RAM) and HWMonitor (for temperature) to diagnose hardware-related issues.
How to Recover Data Loss Due to a Computer Shut Down Instead of Sleeping?
Unexpected shutdowns not only disrupt your current work but also cause
data loss issues on your device. Such data loss issues can put you in trouble, especially if important files or unsaved work were active at that time. If you find any important files missing from your device due to unexpected shutdowns, try free data recovery software tools like Stellar Data Recovery Free to restore them. This all-in-one data recovery software supports recovery of files deleted from any internal or external storage devices, including HDDs, SSDs, and more.
The Stellar Data Recovery Free tool allows you to recover up to 1 GB of data at no cost. For larger file recovery, you can explore the premium versions. To recover your files using the free software, you need to follow the below steps:
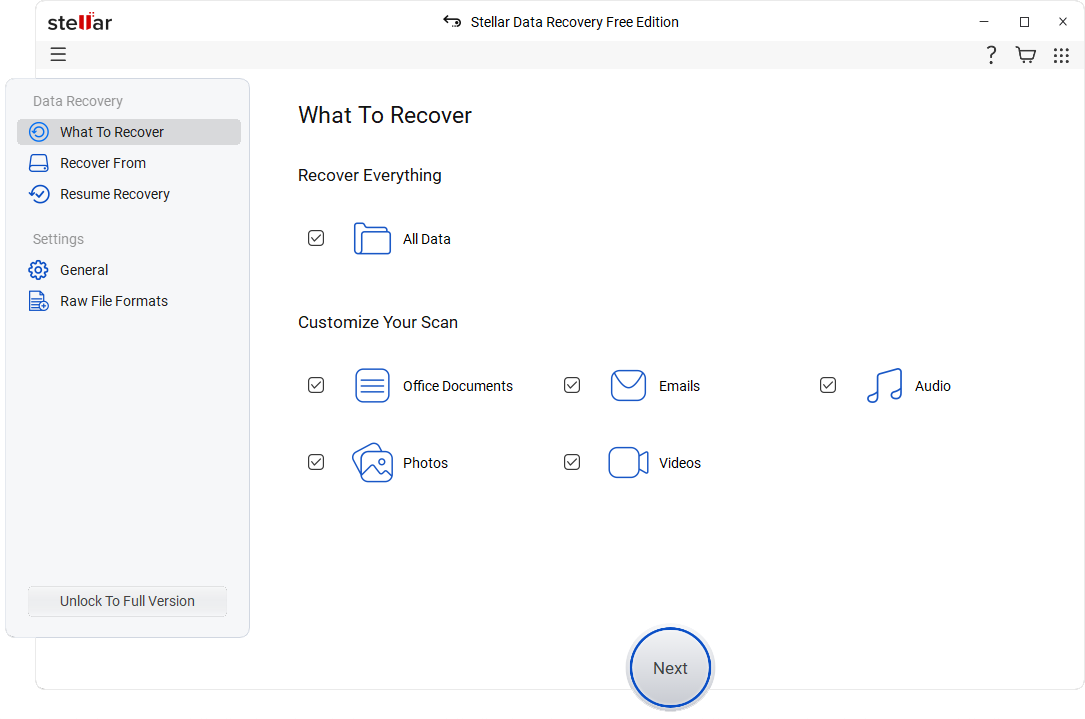
Step 1: Download and install the Stellar Data Recovery Free software on your device. Launch it and select the type of file you need to restore (or select All Data to restore everything) and click
Next.
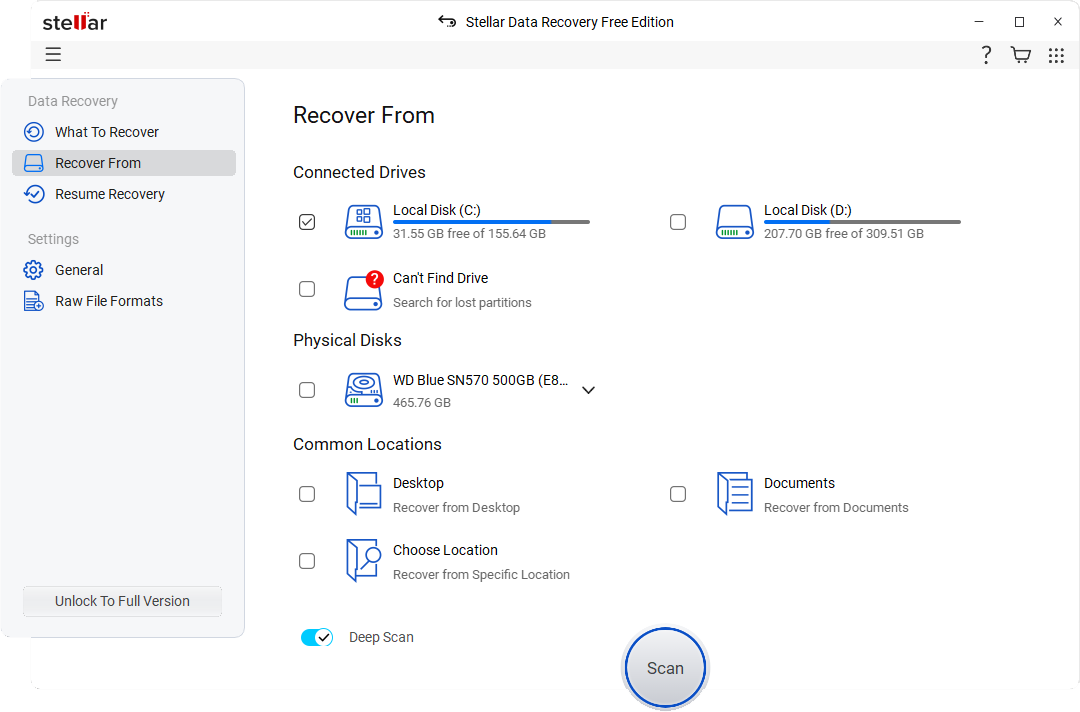
Step 2: Now, choose the storage location or drive where your deleted files were earlier stored and click Scan to initiate the scanning process.
Step 3: Once the scan completes, preview the recovered data and choose the one you want back. Click Recover to save selected files to the desired location on your PC.

Final Thoughts
When your computer shuts down instead of sleeping, it not only wastes time but also causes data loss issues. You can try basic solutions such as updating the installed drivers or apps, correctly configuring power settings, adjusting BIOS options, and similar steps to resolve the issue on your own. Moreover, if you encounter data loss issues on your device, you can use
free data recovery software like Stellar Data Recovery Free to restore your deleted files.
By following the above steps, you should be able to restore your PC’s sleep functionality and enjoy the convenience of instant wake-ups without unexpected shutdowns.